Getting Started
Welcome to Jinno — your new sidekick for React development. In just seconds, you'll be previewing, editing, and exploring components like never before, right from your IDE 🚀
Step 1: Install Jinno

You can install Jinno from your favorite extension marketplace:
Jinno works out of the box. No setup. No config. No source code changes.
Just open → click → preview.
👉 VSCode Marketplace
If you're using VSCode:
Install from VSCode Marketplace
🌀 Cursor / Windsurf (Open VSX)
If you're using Cursor, Windsurf, or another Open VSX-compatible editor:
Step 2: Open a React Component
Start by opening any .js, .jsx, .ts, or .tsx file that exports a React component — either a function or a class.
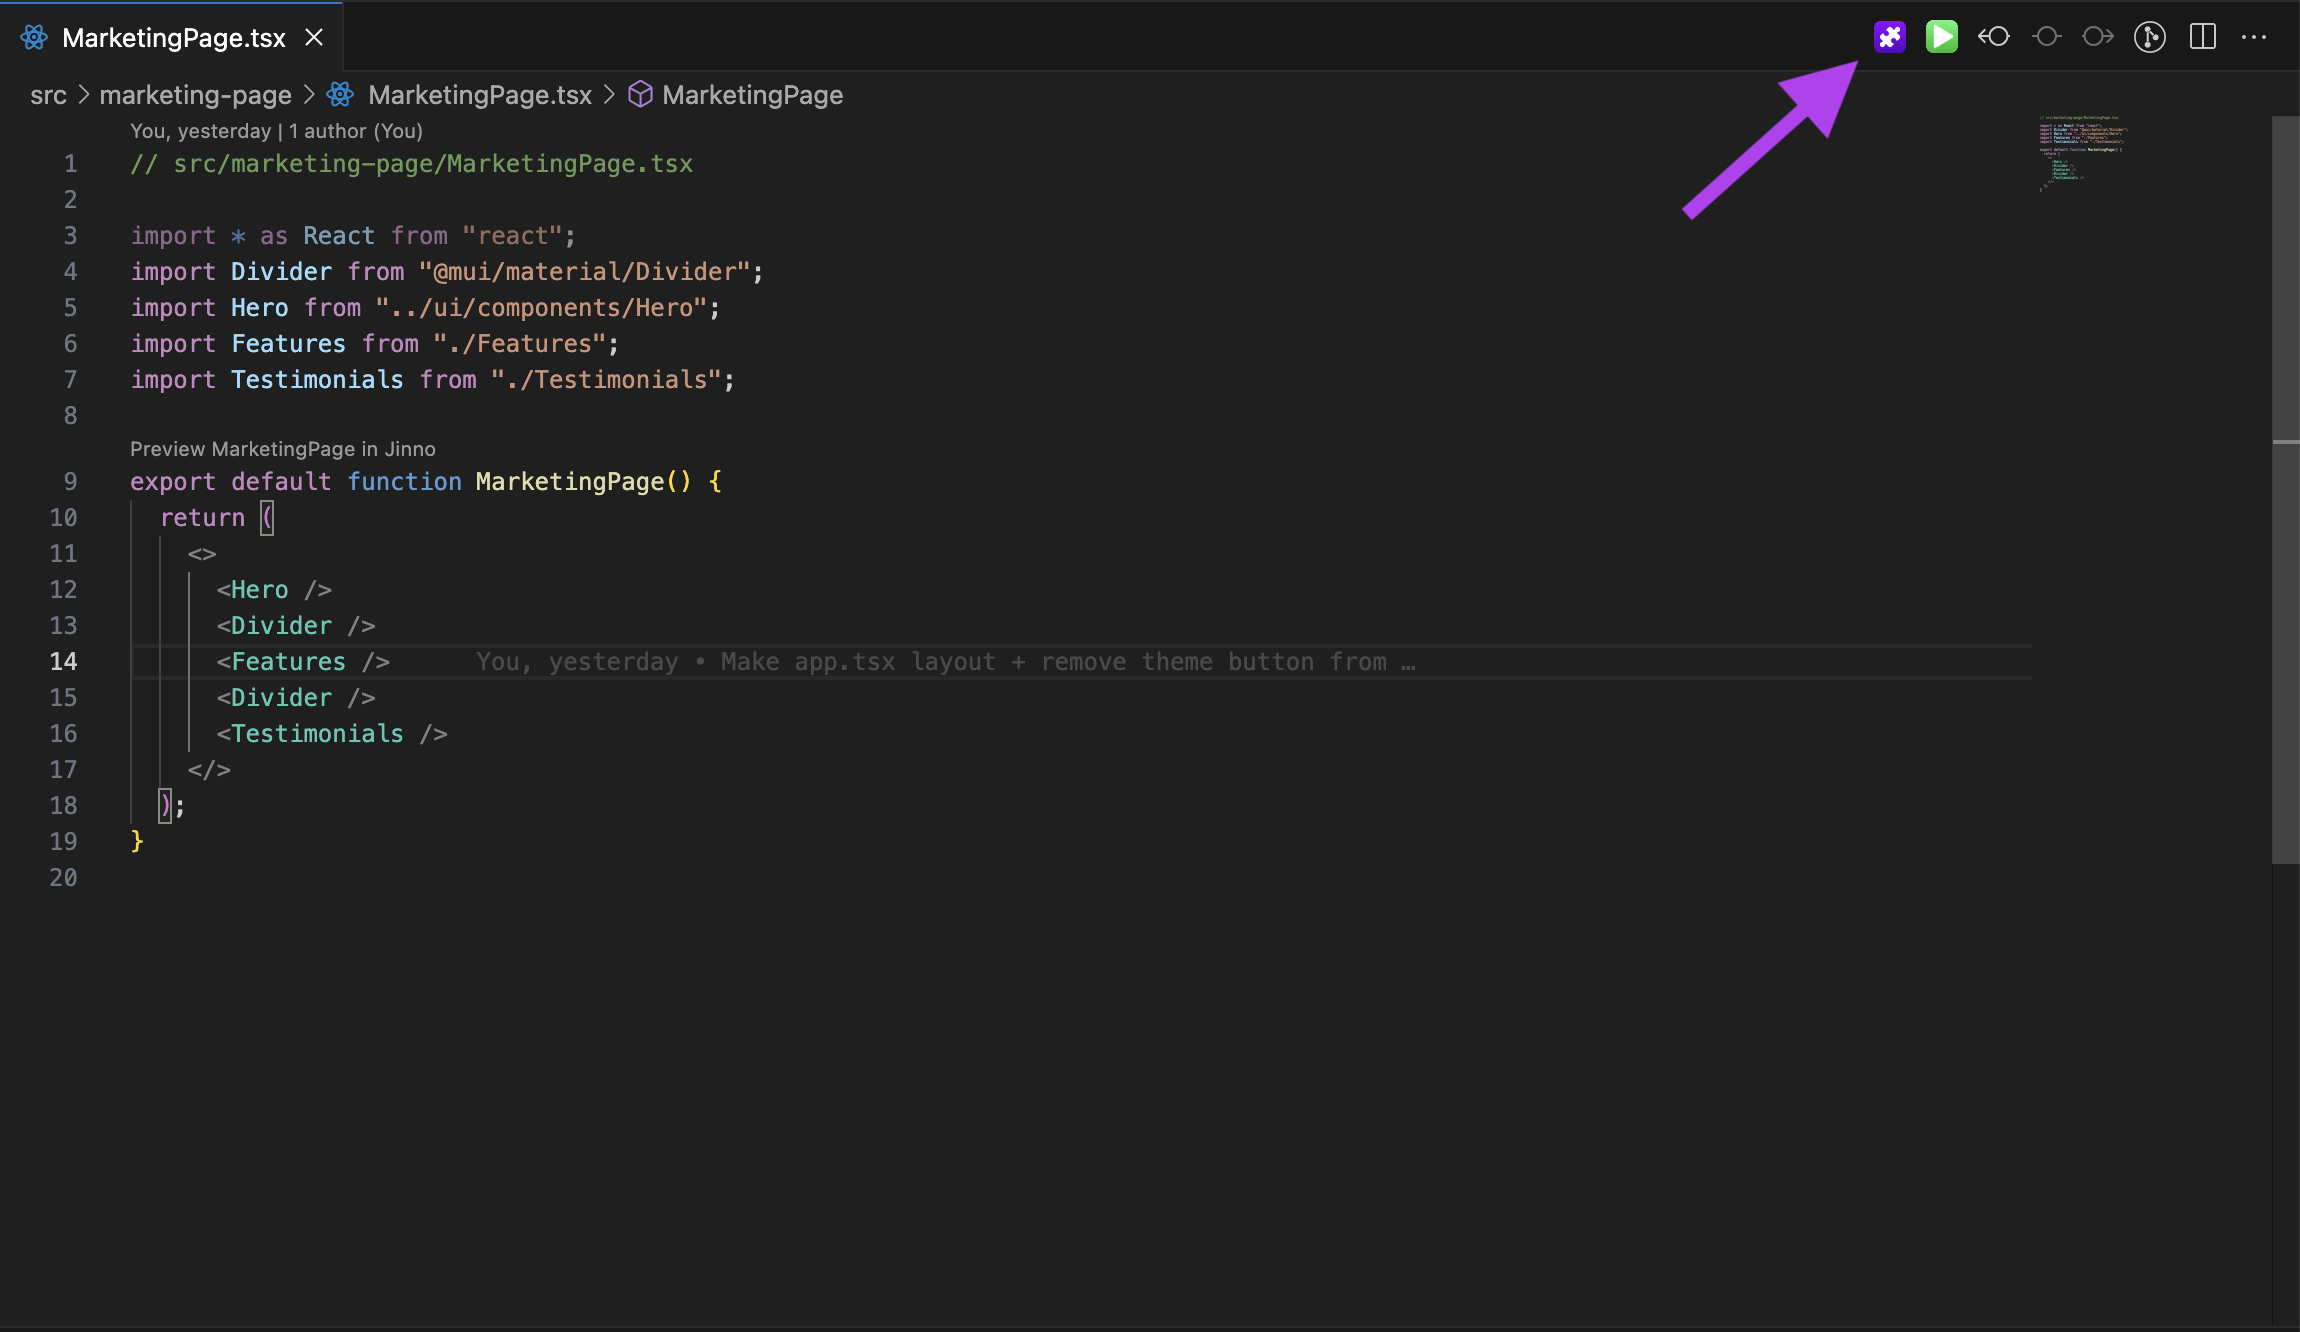
When the file is ready, you'll notice a purple "Toggle Preview" button at the top-right corner of your editor window.
💡 This button appears automatically when Jinno detects a React component in your file.
Click the purple "Toggle Preview" button — and that’s it!
You can also launch the preview using any of the following methods:
-
Keyboard Shortcut
⌥ Option + ⌘ Cmd + L(Mac)
Alt + Ctrl + L(Windows/Linux) -
Command Palette
Open the Command Palette and runJinno: Toggle Preview -
CodeLens (above your component)
Hover over the function or class declaration — click “Preview with Jinno”
Jinno analyzes your React component, its props, and dependencies to create a fully isolated sandbox. This sandbox renders your component in real time and automatically tracks any changes you make, ensuring a seamless development experience.
Once the preview is open, you can:
- 🔁 See real-time updates with live preview
- 🧠 Use auto-generated props (from types, usage, or stories)
- 📘 Leverage your
.story.tsxfiles for full variant control - 🪄 Select elements and use AI to perform code edits
- 🔍 Instantly jump to source code by clicking any element
🧪 Next Steps
- Use More Features →
- Explore the AI Editing Agent →
- Get answers in the FAQ →